
Ventanus takes the vox horn. ‘This is Ventanus, Captain, 4th,’ he begins. ‘I am making an emergency broadcast on the global vox-cast setting. The surface of Calth is no longer a safe environment. The local star is suffering flare trauma, and will shortly irradiate Calth to human lethal levels. It is no longer possible to evacuate the planet. Therefore, if you are a citizen, a member of the Imperial Army, a legionary of the XIII, or any other loyal servant of the Imperium, move with all haste to the arcology system closest to you. The arcology systems may offer sufficient protection to allow you to survive this solar event. We will shelter there until further notice. Do not hesitate. Move directly to the nearest arcology. Arcology location information access information will all be appended to this repeat broadcast as a code file. In the name of the Imperium, make haste. Message ends.’
– Captain Remus Ventanus ordering the loyalists on Calth to seek shelter underground. Know no Fear, by Dan Abnett.
In this post, I will mark the start of my next big army project (nothing to do with Iron Warriors, funnily enough!) – that is, a force which represents the Ultramarines and their allies in the moments after the Word Bearers main assault on Calth has concluded, just as they begin to head underground to shelter from the solar radiation from the Veridian Star.
What is Calth?
For those less familiar with the lore, Calth is a key engagement during the Horus Heresy, the galactic civil war set 10,000 years prior to the events of Warhammer 40,000. Calth is one of the Worlds of Ultramar, the vast interstellar realm governed by the XIII space marine legion , the Ultramarines. The world comes under attack just after the start of the Heresy when the Word Bearers Legion join the Ultramarines for what the latter believes will be a co-operative military campaign against an Ork empire in the region; however, unbeknownst to them, the Word Bearers have long forsaken the cause of the Emperor, turning in secret long ago to the dark forces of Chaos. They already played a part in the purgation of loyalist forces led by the Warmaster Horus Lupercal in the Istvaan system, however, the XIII Legion were unaware of this at the muster, and as such, were caught completely off guard when the traitors launched their brutal orbital assault.
The Forces
And now to get into some hobby. as mentioned, this force will predominantly consist of Ultramarines, but also include some non-astartes allies. To start off with, here’s a couple of step by step guides to how I have painted two of my different baseline infantry units, as per popular request:
61st Numinus Grenadier
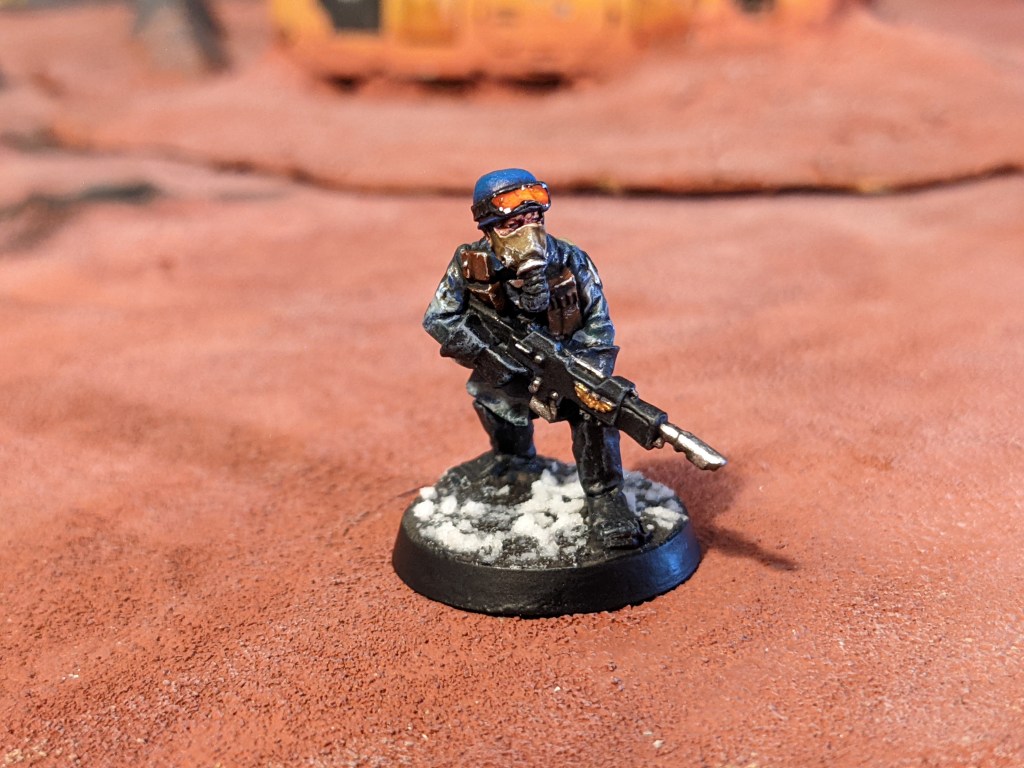
This Imperial Army soldier is one of a squad of 10 grenadiers, made from the sadly not long ago discontinued Armageddon Steel Legion models. The 61st Numinus is one of the most prominently mentioned human army regiments from Know no Fear, and with this force, I wanted to try and include at least a small amount of each key loyalist faction – Ultramarines, Imperial Army and Mechanicum. I bought the models just before they went out of production, and I’m glad I did, because they suit the look I’m going for pretty well. The novel itself doesn’t do that much to mention the kind of equipment that the 61st or other regiments have, but from what little you do get, one has the impression that these troopers have fairly straightforward, practical gear – I feel like the look of the Steel Legion models fits that perfectly, but also differs from the far more commonly seen Cadian pattern equipment – I feel that these models, with the paint scheme I have given them, add a nice bit of uniqueness to my force. So, on to how I paint them.

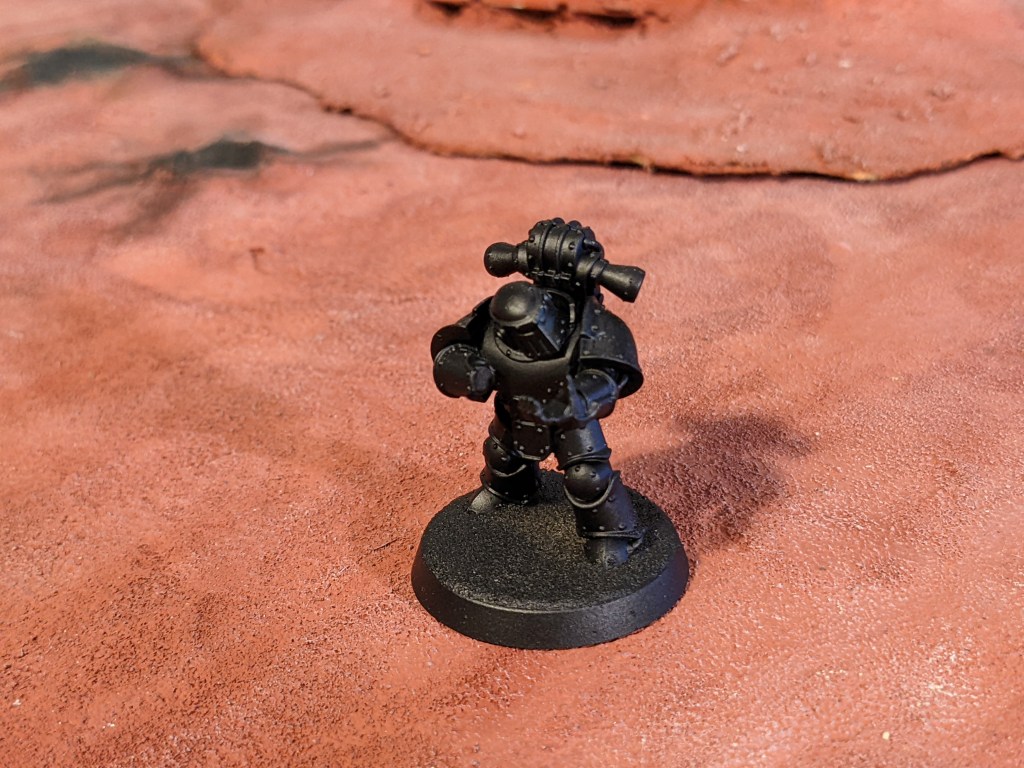
Step 1 is entirely straightforward – Chaos Black undercoat, or Halfords Matt Black like I did if you don’t want to waste your money. You can pick out anywhere the spray has missed with a brush. The base material is simply sand and PVA, applied before the undercoat.
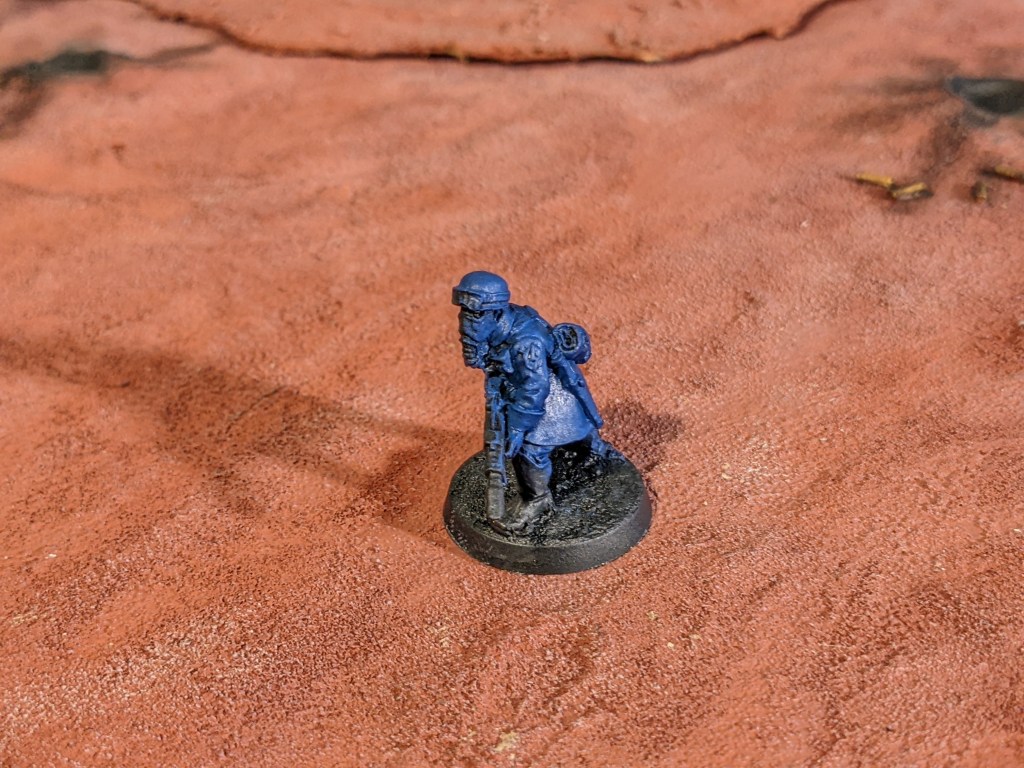
Step 2 – base coat the whole model with Macragge Blue (I actually used Mordian Blue, the older version of the same colour. These paints do keep y’know!). It’s not too important that you cover bits like the lasrifle or the boots, because we’ll be going over those in black anyway.

Step three is the fun part – the camouflage. I designed this pattern both to tie in to the dark, wintery basing scheme that I’ve gone for, and also fit in with the blue of the Ultramarines whilst maintaining an essence of practicality and not standing out like a peacock. I only do the jacket, as this gives it a similar look to what you get with certain historical uniforms (for example, British Airborne and German Fallschirmjager). This also goes with the helmet design.
To achieve the effect, the main thing you need is a steady hand and a brush with a good tip. I used a medium citadel layer brush. The colours I used on top of the blue were Caliban Green and Blue Horror – my camo ‘blobs’ are similar in shape to that of British Army DPM, so if you’re going for this then that’s something you can follow.
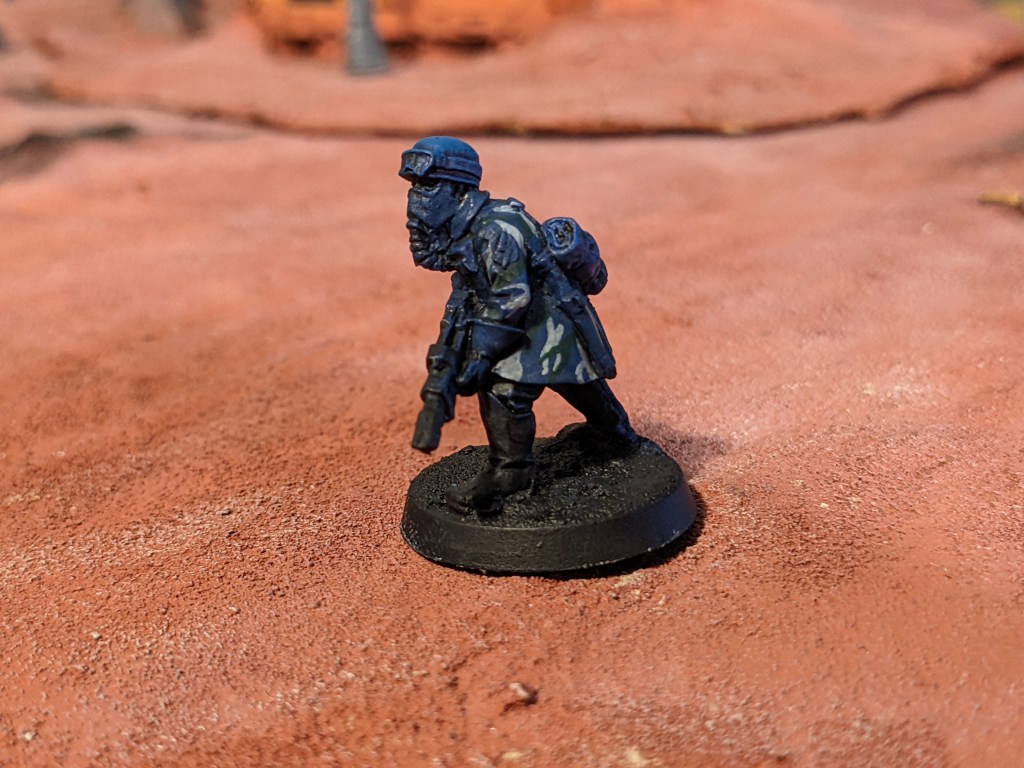

For step 4, I wash all of the fabric areas with Nuln Oil. Simple as. Avoid the helmet though, because once this has dried, I go over this with Magos Purple contrast. When this has dried, I give it a drybrush of Caldor Sky. This gives me a nice deep, vibrant blue that matches the Ultramarines power armour and ties the army together.
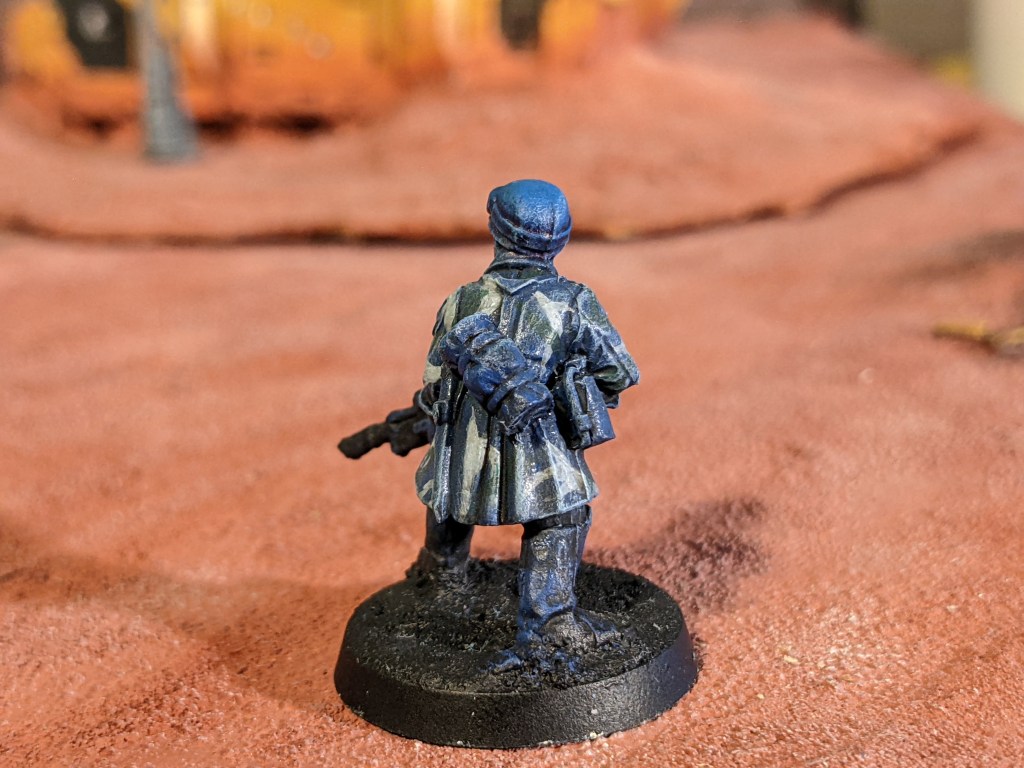
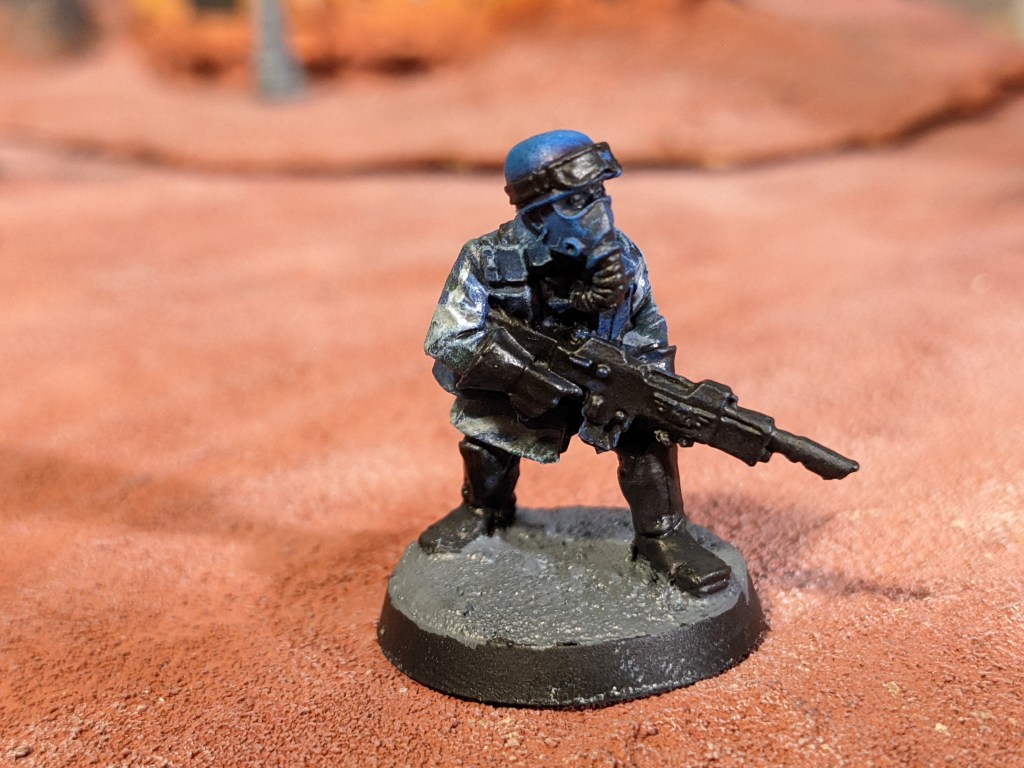
In step 5, I first of all I drybrush the whole model with blue horror, helmet included, to highlight the raised areas. Then, I pick out the main black areas, being the gun, gloves, boots, rebreather hose, webbing straps and goggles. I also used this step to paint the sand texture on the base in Mechanicus Standard Grey.

Step 7: Wash the base with Agrax Earthshade and then carefully drybrush the black areas and the base once it has dried with grey (Mechanicus Standard again), taking care not to go over the fatigues if possible.

After this, for step 8 I pick out everything that is flesh coloured, beige and brown, and in that order. Doing the eye and ear area first, this allows us to then paint the rebreather in a tan colour afterwards without getting flesh tone on it. Do bear in mind that the fleshy bits on these models are a very small area to work with. I also do the bed roll at the back in tan. Last of all I do the leather bits brown, such as the webbing pouches and bayonet sheath. Colours used are Cadian Fleshtone, Zandri Dust and Doombull Brown.
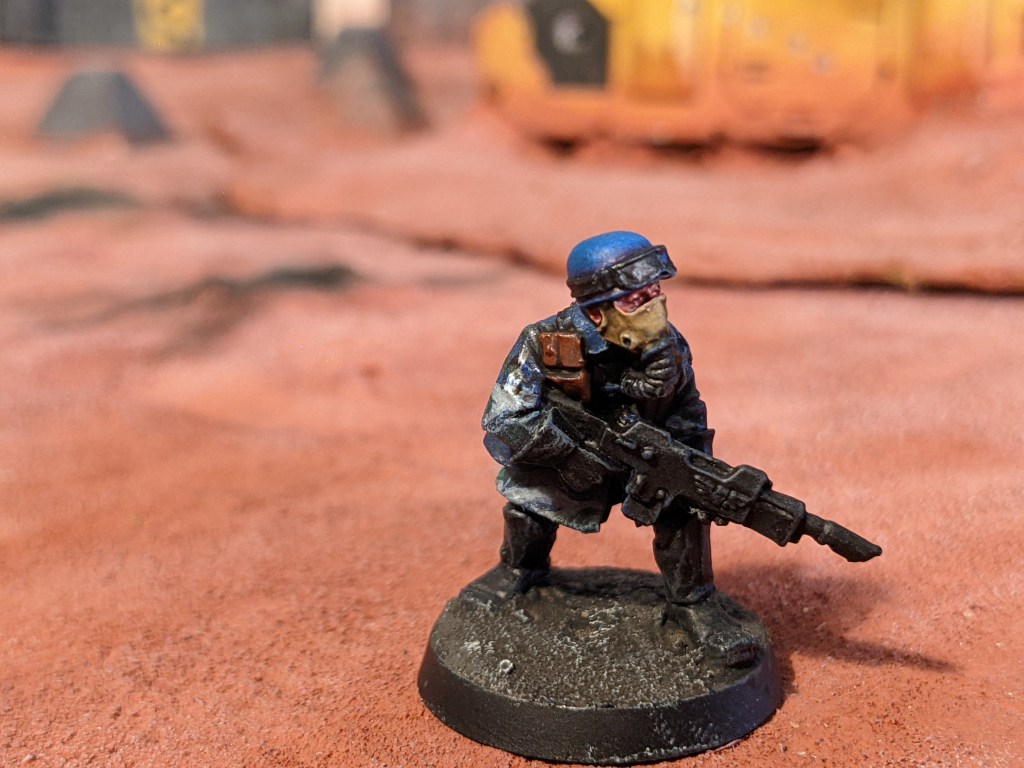
Step 9: I then shade the leather bits and the rebreather with Agrax. Round the back I’ve actually shaded the bed roll with Athonian Camoshade for some colour variation, but that’s up to you. For the flesh, I’ve shaded it with Magos Purple contrast.
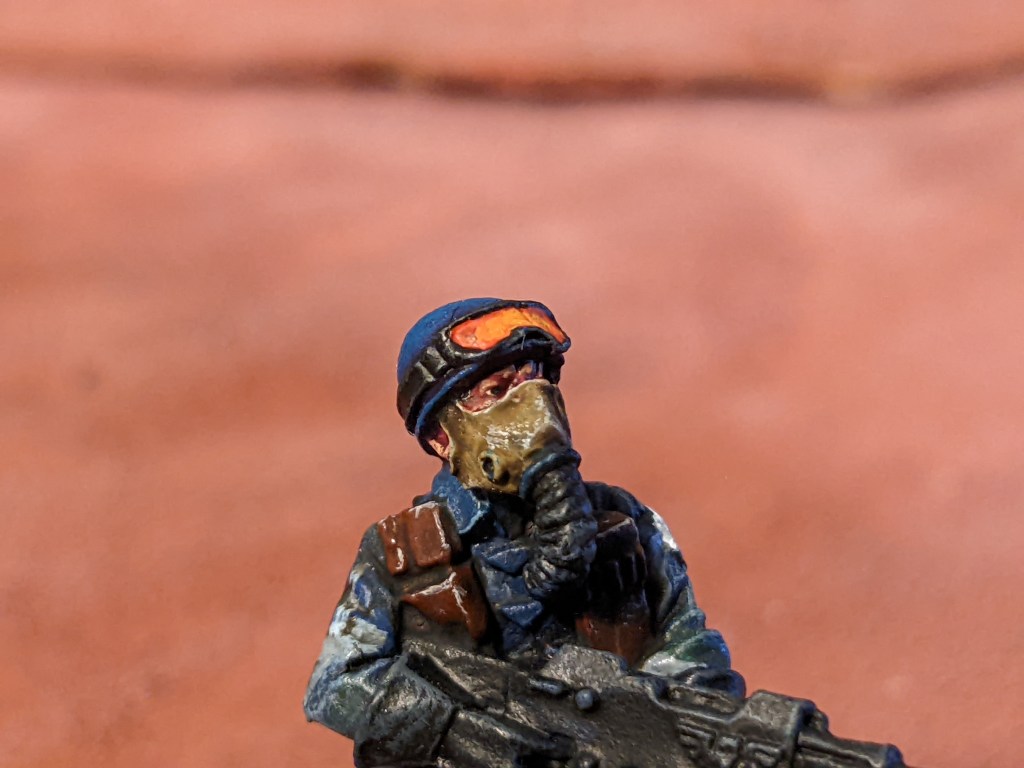
Step 10, otherwise known as the hard bit: Facial detail. You’re going to want quite a fine brush to achieve the eyes, or you could just not bother. I used The Army Painter’s Insane Detail, and the main thing you want to work out before you even start is where the eye actually is – I do the whites of the eyes first, and make sure to be super careful not to put too much paint on there – the lesser the better, as long as it can be seen where the whites of the eyes would be. If you’re so inclined, you can also paint a dot of brown, green or blue for an iris, but this can be even more hard work. Then it’s just a drop of black for the pupil. MAKE SURE YOUR PUPIL IS IN THE RIGHT PLACE IF YOU ARE GOING FOR THIS EFFECT OTHERWISE HE WILL LOOK COCK EYED. DO YOU REALLY WANT PRIVATE SLOTH FRATELLI CHARGING THE ENEMY HEAD ON?? Both his eyes need to be looking in the same direction. Get this right or don’t do it, trust me. There’s no shame in just shading round the eye area if you don’t feel up to painting the eyes. As well as the eyes, I picked some of the raised areas out with a small amount of Cadian Fleshtone over the top of the purple contrast for a bit of definition.
On another note, I also used this step to do the goggles – I simply wet blend some Yriel Yellow over Evil Sunz Scarlett to get some colour definition for this. The orange is one of the colours that will really help the model stand out with the otherwise fairly dark colour scheme. I have picked out the edges of the leather and the rebreather to give definition as well, using Wraithbone.
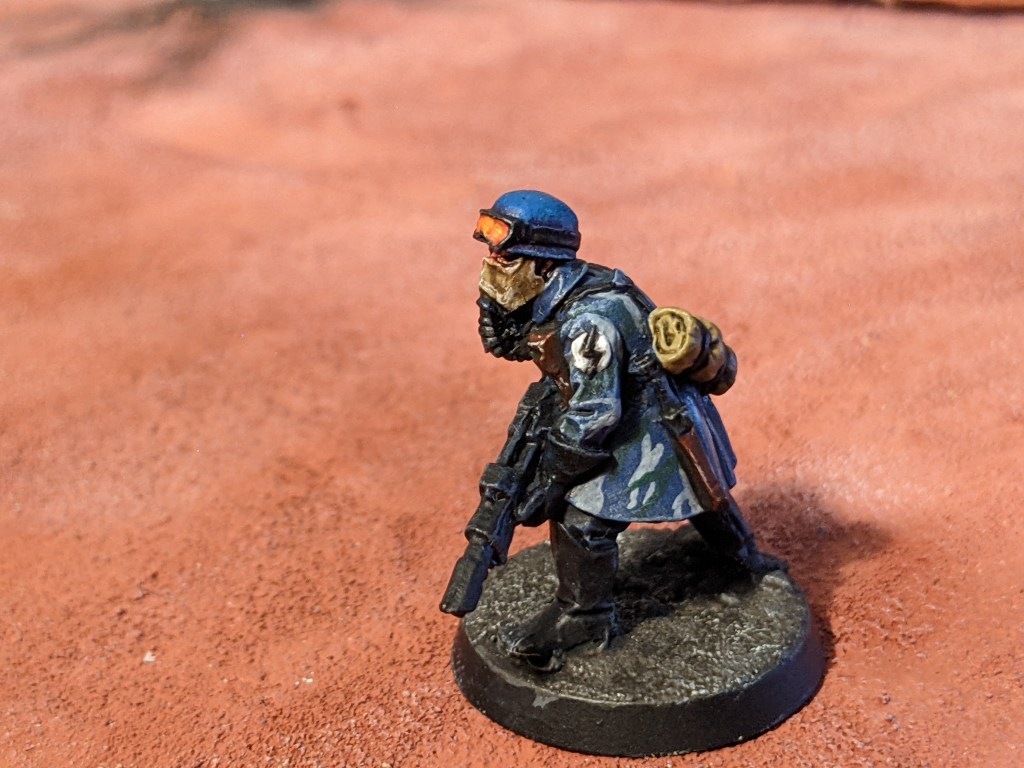
Step 10 – I’ve kept the Steel Legion insignia as it can be tricky to remove with metal, and I like the look of it. It’s a unit marking. White base, light Nuln Oil shade, black lightning bolt, pick out the raised white areas again with Ceramite White. Simple as.

Step 12 is the metal – that is, the metallics on the lasrifle, water bottle round the back, tunic buttons, webbing clasps and rebreather O ring. I used Leadbelcher. I also did the aquilas in gold to match the trim of the Ultramarines (Hashut Copper base, then Auric Armour).

The final step I’ve done all at once – shade all the metallics with Nuln Oil, and then pick out the raised areas with Stormhost Silver. Likewise, I shade the gold with Agrax and then pick out the fine bits with Stormhost. Now for the finishing touches – I go over the goggles with Ardcoat to give a glossy texture, and use Vahlhallan Blizzard for the patchy snow. Know no Fear doesn’t clearly state what kind of climate we are dealing with on Calth, but I went for this wintery scheme because I think it gives it a nice dramatic look, and contrasts well with some of the darker colours. The very last step, of course, is to run round the base rim with Abaddon black. Now, the model is complete!
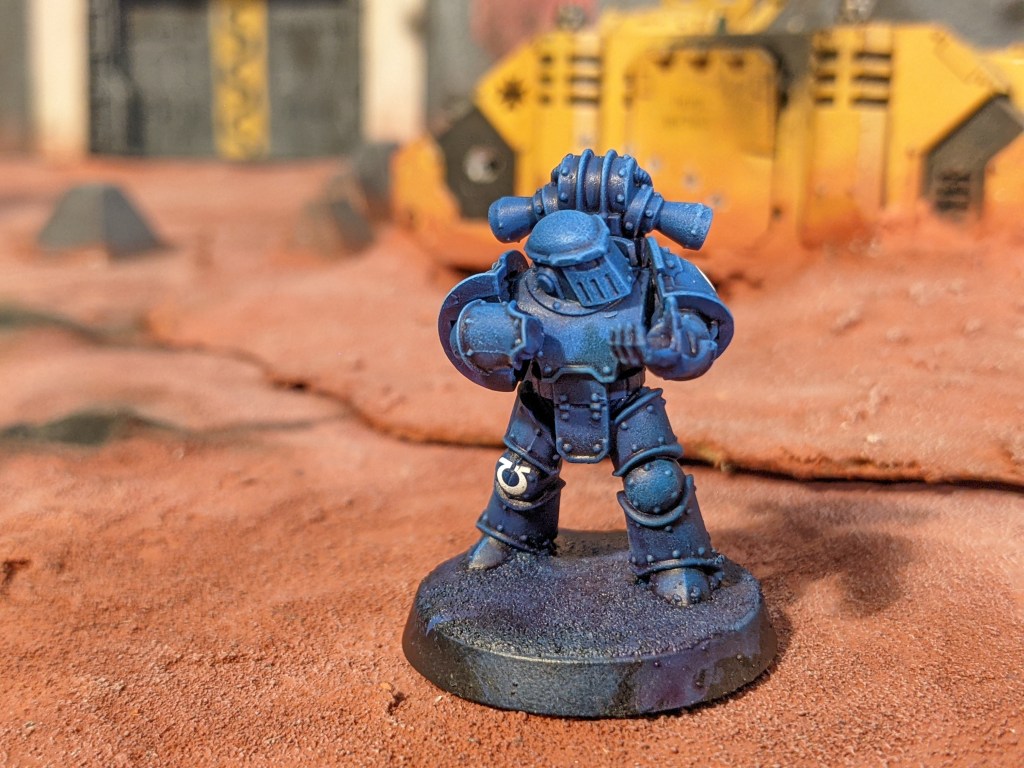
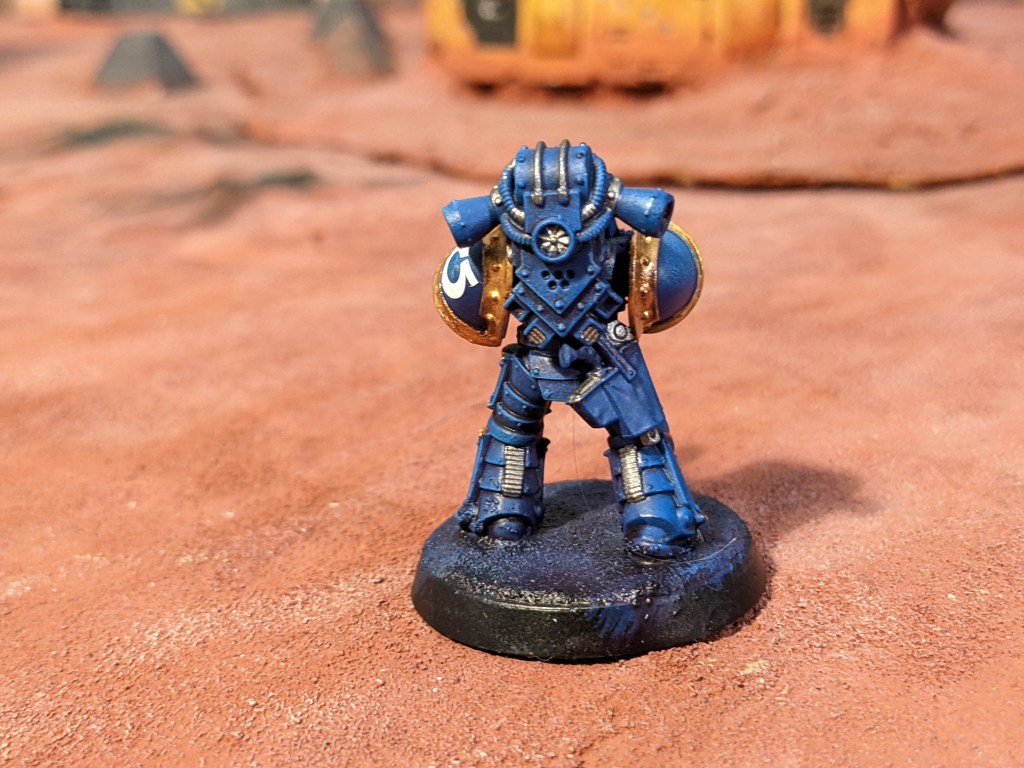
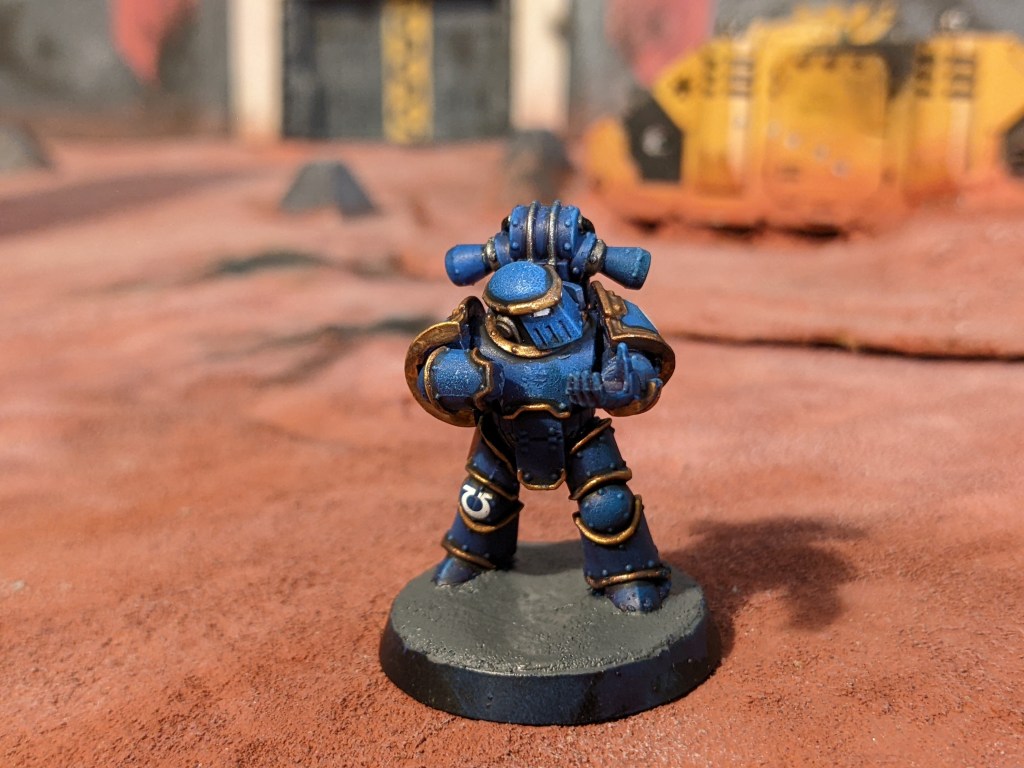
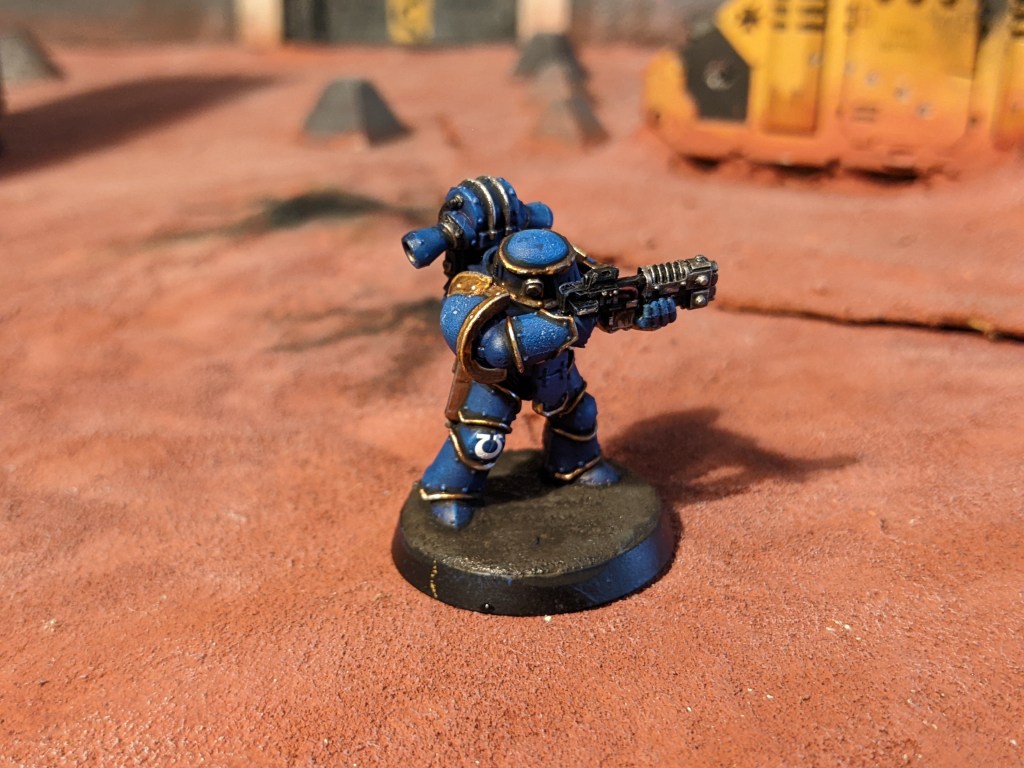
IV Company Support Legionary
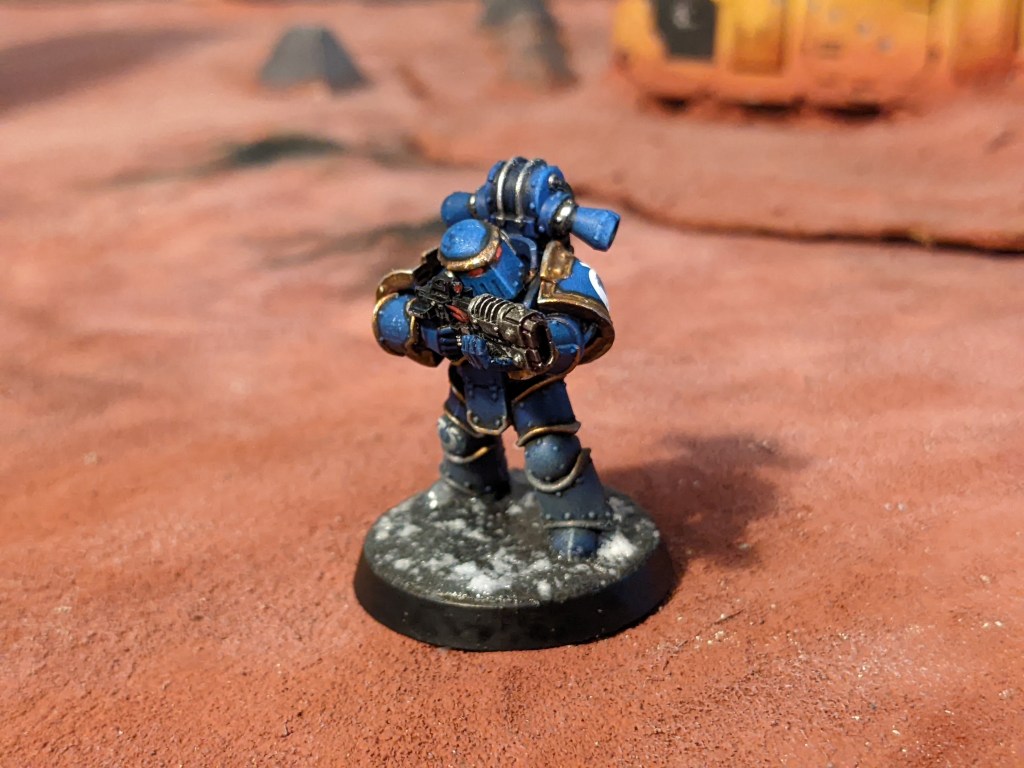
A warrior of the XIII Legion, this marine is part of a tactical support squad from Remus Ventanus’ IV Company. He wears MKIII power armour, and is armed with a volkite charger, an energy weapon that discharges a deadly beam of heat energy powerful enough to burn most lesser targets to a cinder. He fights alongside his fellow legionaries as the Battle of Calth rages, as well as surviving Imperial Army units such as the 61st Numinus, and elements of the Mechanicum. I had some spare volkites left over, and have gone for MKIII to represent them being equipped for heavier actions, such as zone mortalis missions.

In step 1, the basing is more or less identical to how we do the grenadier – black undercoat, blue base.

For step 2, I’ve gone over the entire model with Magos Purple. This colour allows the recesses to be dark, but also keeps the blue nice and vibrant.
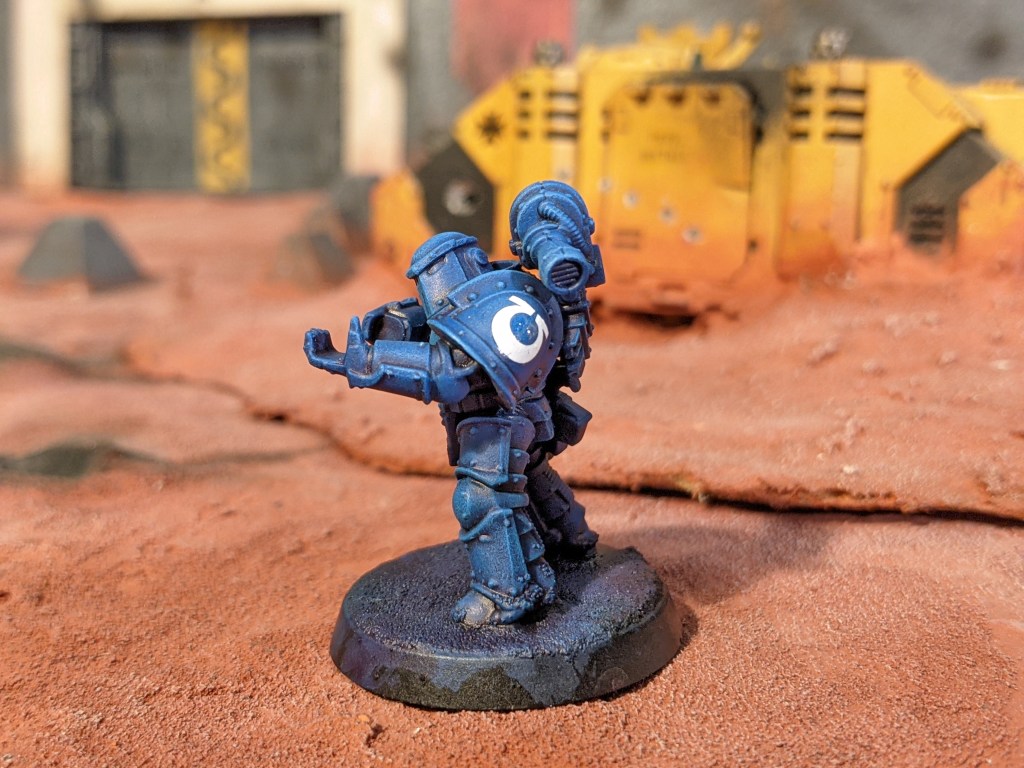
Step 3 – the drybrushing. As you can see I’ve done this in one go, but it’s actually pretty hard to go wrong. First of all, I go over everything again with the Mordian Blue, mainly the flat surfaces that are lower down, and after that, I move onto Caledor Sky. This is a lovely blue that really stands out, and when I’m using it here, I pick out the more prominent flat areas, such as the pauldrons, helmet and chest, again picking a point to concentrate the majority of the drybrushing for tonal variation. Lastly, I then move onto Blue Horror – because it’s been used for drybrushing I don’t clean off the Caledor Sky as this creates a nice mid tone. I’ll go over the higher areas twice with this, as the second time will be an even lighter tone. As you can also see, I applied the decals during this stage. Use Microsol or something similar and make cuts around the edges of the decals for smooth application onto curved surfaces.
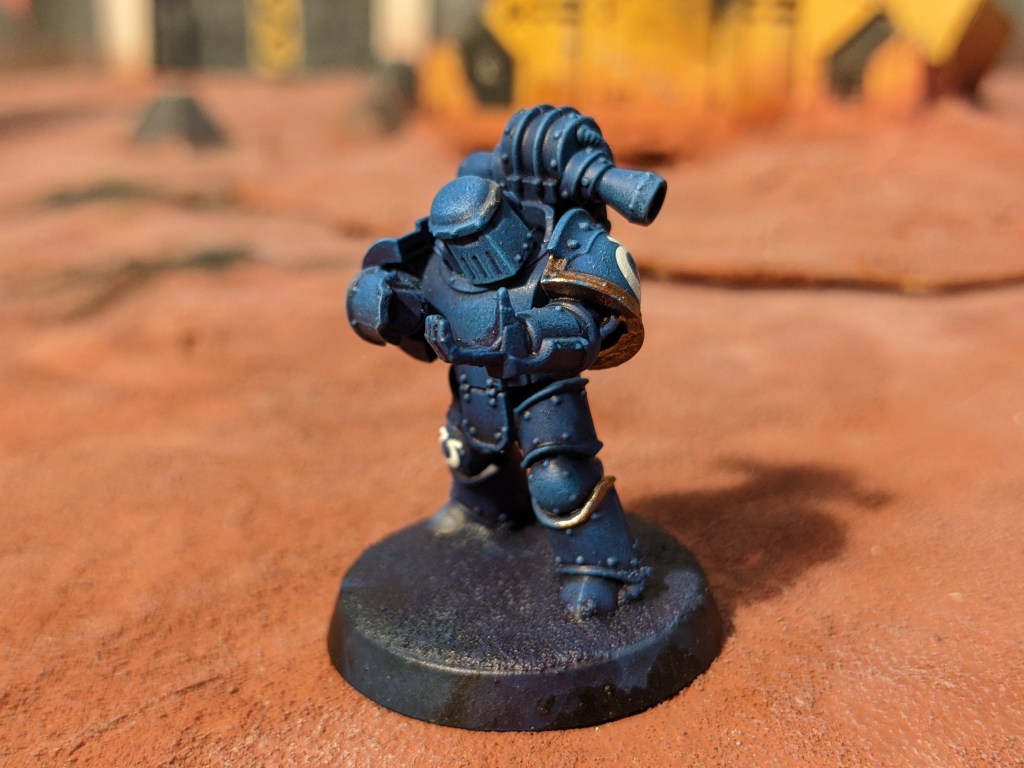
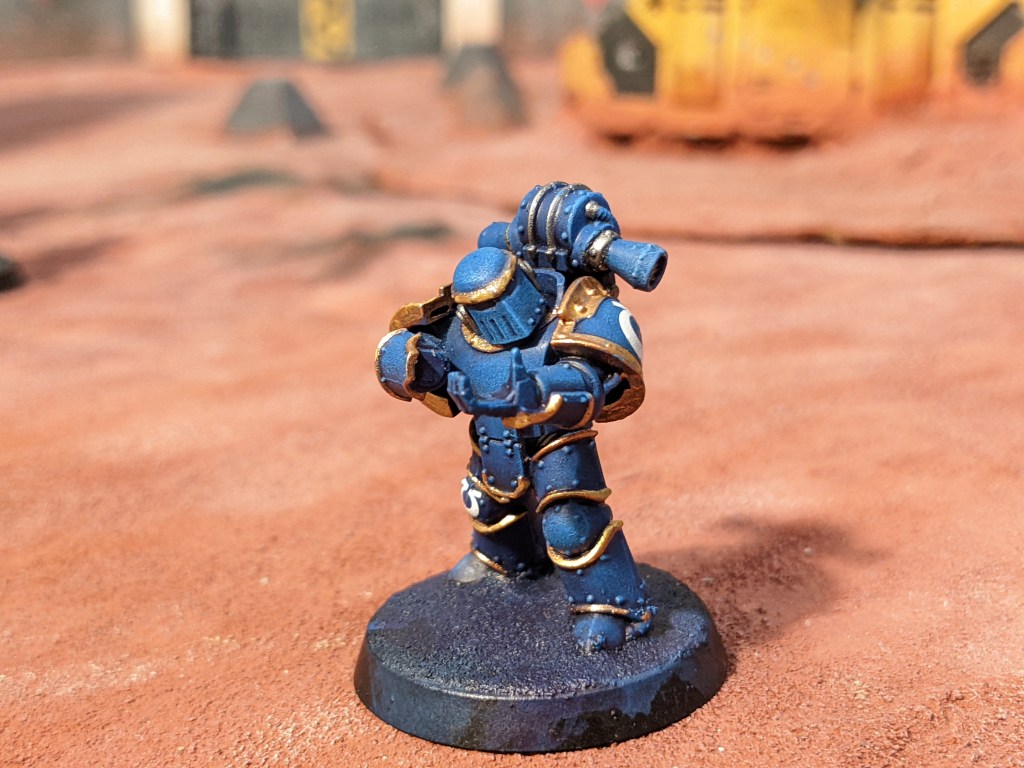
Step 4 is by far the longest and easily my most hated step on MKIII armour – the metallics. Simply because there is so much damn trim. As long as you have a brush with a decent tip though, you will get there. Start by picking out the trip in Hashut Copper, and then go over the majority with Auric Armour. As you can see, the trim is all over, and this is the main thing that’s time consuming. As well as this, I do the gunmetal details, such as the details on the backpack, vents and underneath the armour joints.
Step 5 – wash that metal! Really makes the difference, doesn’t it? Agrax Earthshade on the gold, Nuln Oil on the gunmetal, taking care not to get too much of the shade on the blue. It probably wouldn’t hurt to change your water beforehand as well, as this can contaminate non metallic areas with metal flake if you’re not careful. I’ve also picked out the middle of the eyes with Corax white, and the base with the Mechanicus Standard Grey.
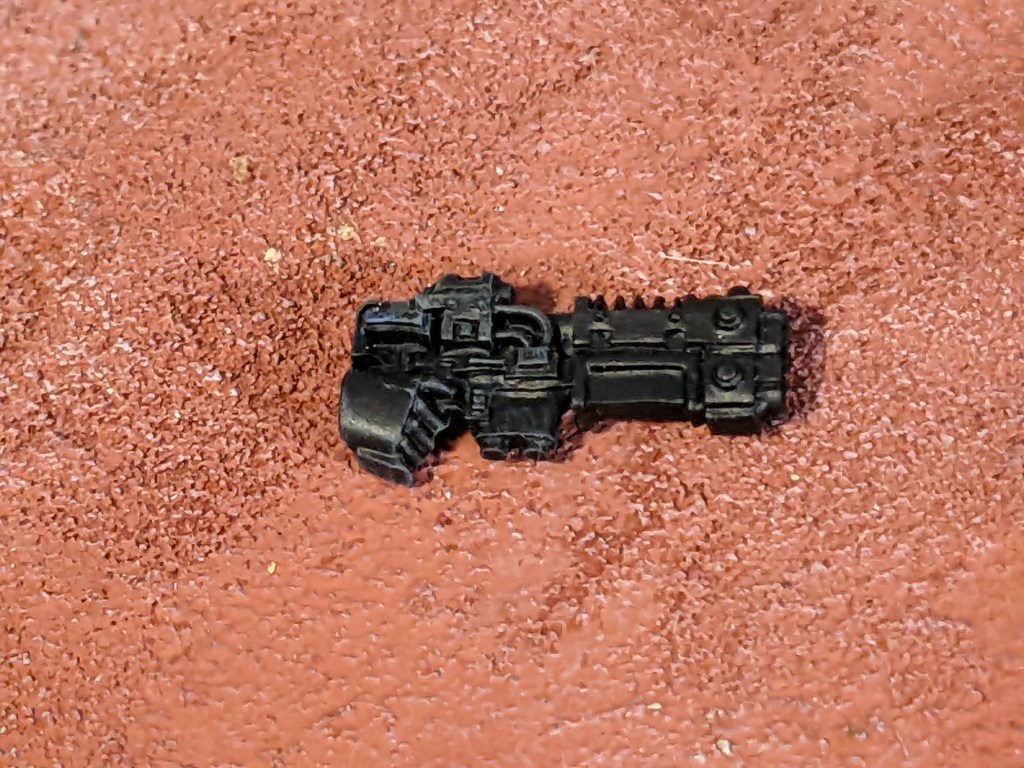
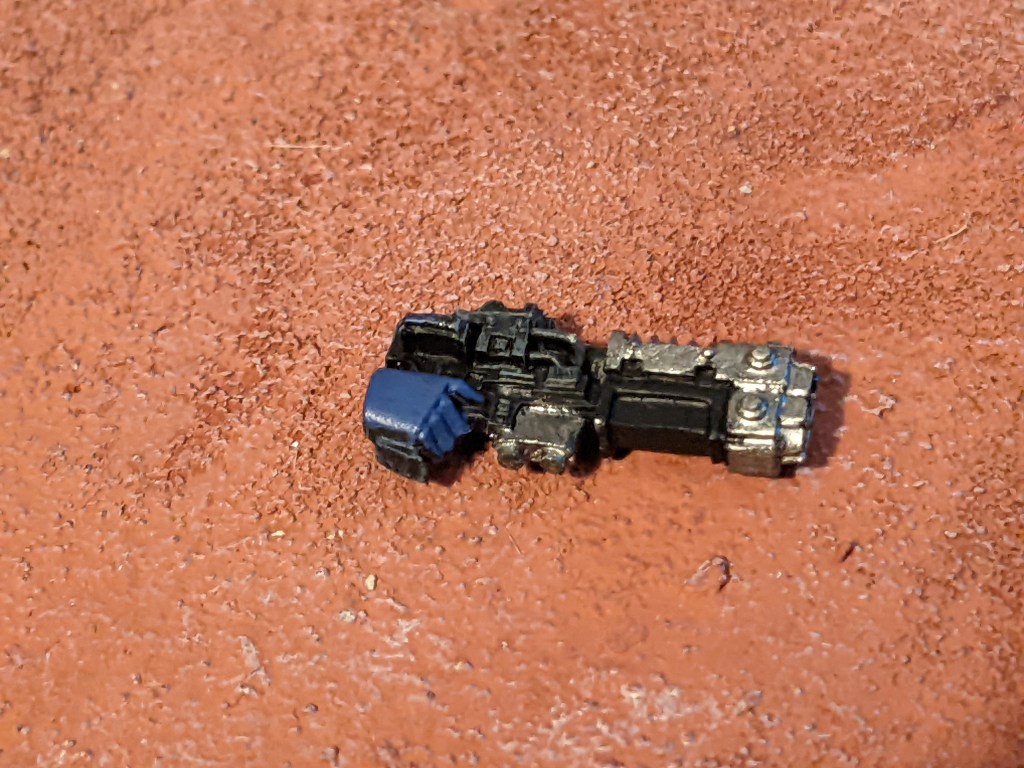
Step 6 is the Volkite charger, which as you can tell I started doing separately to the rest of the model. Black base, drybrush with the Standard Grey, and then pick out areas such as the muzzle, heat sync and power unit with Leadbelcher. Obviously paint the blue hand the same way you would the rest of the armour whilst taking care not to get blue on other areas of the weapon. Shade the metallics of the gun with Nuln Oil, and then drybrush them carefully with Stormhost Silver. After this, pick out the wires on the gun with Khorne Red, and then shade both these and the muzzle with Magos Purple. Doing this on the muzzle gives a nice heat bloom effect, and because it’s such a small area I really don’t think you need multiple colours. I also did a tiny dot of Evil Sunz Scarlet on the sight, and then superglued it to the model.
You may also notice in this stage that I’ve gone over the leather in Doombull brown, the pipes on the backpack with Abaddon Black, and then shaded the leather and the base with Agrax Earthshade. As well as this, I’ve picked out all the raised areas on the metal with Stormhost Silver (both gunmetal and gold). With the gold, this actually adds quite a lot of depth when it’s done sparingly, almost giving a kind of sheen effect.

Step 7 – drybrush the base with the Standard Grey, and also lightly drybrush the feet and lower leg area, up to round about the knees. Then, drybrush the same area again with Wraithbone, to get a nice weathered, dusty look. We’ve also done the eyes, which is pretty simple – I actually mixed Evil Sunz with Contrast Medium to make my own contrast that would go nicely over the whites of the eyes, but I’m sure there are plenty of similar things you can use. I think a lot of people go overboard on lenses, but with me, I like the middle to stand out, and as long as that’s the case then I’m happy.
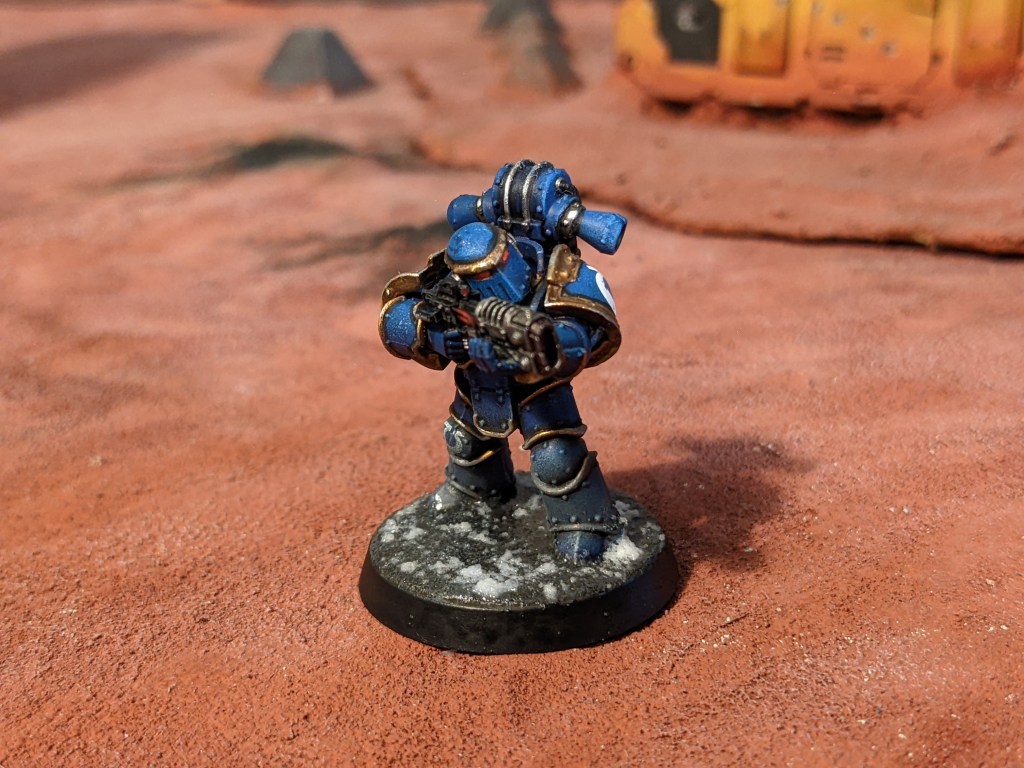
Step 8 – usual finishing touches. Add the snow and paint the base rim, exactly how we did with the grenadier, and viola! The blue is still vibrant, but he looks battered as well. During the Battle of Calth, it was said at one point that the Ultramarine defenders were covered in so much grey dust that they almost resembled the grey armour that their hated enemies, the Word Bearers, once wore. Naturally I still wanted these guys to look like Ultramarines, but at the same time, I think the weathering and the grittiness help pay homage to the brutality of the battle.

Well that’s it for now, hope you enjoyed and hopefully more to come!
